Quick answer
Before prototyping a magnetic closure, define its job, how it must hold and release, the material layers around it, and how the hardware will stay attached. Review care requirements, component availability, and user-specific hazards. Then plan focused construction trials before committing to a complete sample. Magnetic strength alone does not determine whether a closure will work well in a soft goods product.
Magnetic closures can make a product satisfying to use. A flap finds its position. A strap connects with less fiddling. An opening closes with a clean, deliberate movement.
But a loose fastener working well on a desk does not tell you how it will behave once sewn into a bag, a padded cover, or a wearable. The fabric bends. The contents push outward. The user pulls from an angle. The layers between the components may change the connection.
Those interactions deserve attention while the product architecture is still flexible.
“Before prototyping” does not mean settling every detail without physical investigation. It means defining the questions and construction direction before asking a sample room to build the entire product.
1. Define what the closure actually needs to do
Start with the task rather than the magnet.
Is the closure holding a lightweight pocket flap in place, securing a loaded compartment, positioning a removable panel, or connecting a strap? Does it need to release easily, resist accidental opening, or support one-handed use?
Write down the expected contents, use position, opening frequency, and consequences of release. Identify who will operate it and whether gloves, limited dexterity, or restricted visibility matter.
A closure on an empty bag may behave differently when the compartment is overfilled. A closure that is convenient at a table may be awkward on the body.
This brief should also leave room for alternatives. A zipper, snap, hook, or conventional buckle may better suit the required function. Magnets should earn their place by improving the product’s use.
2. Distinguish magnetic attraction from mechanical locking
“Magnetic closure” describes more than one arrangement.
| Closure approach | What to establish before sampling |
|---|---|
| Magnet-to-magnet closure | Attraction through the intended layers, orientation, positioning, and resistance to unwanted opening |
| Magnet-to-steel closure | The specified mating material and geometry, the gap, and how the parts locate against each other |
| Magnetic-mechanical fastener | How the magnets guide engagement, how the mechanical lock holds, and the intended release movement |
FIDLOCK describes its fastening approach as combining magnetic attraction with a mechanical lock. That is an important distinction from a closure held together by attraction alone.
For a fastener incorporating a lock, obtain the exact component documentation. Confirm the permitted loading, mounting method, release direction, and intended applications. A component rating is not a rating for the sewn product around it.
For carrying or restraint functions where release could cause injury, component selection and validation need the appropriate engineering input. A familiar-looking magnetic buckle is not enough evidence of suitability.
3. Define the loading and release directions
A catalog pull-force figure describes a particular measurement setup. K&J Magnetics explains how its pull-force tests are performed, including the mating surface, alignment, and gap.
The useful design question is how the finished closure will be loaded.
A direct pull separates the faces. A sideways force tries to slide them. A flexible flap can start opening at one edge, introducing a peeling action. Those conditions should not be treated as interchangeable. K&J’s discussion of magnetic shear force also distinguishes sideways separation from direct pull.
For a bag flap, inspect what happens when the compartment is full, when the user grabs a corner, and when nearby straps are tensioned. For a mechanical release, consider whether normal handling could imitate the intended opening movement.
Define deliberate opening and accidental release separately. Increasing holding force may make the product harder to open without solving the underlying geometry.
4. Account for the complete material stack
A concealed magnet may sit behind shell fabric, lining, reinforcement, adhesive, and its own protective enclosure. The mating side can add another set of layers.
K&J’s sewing-magnet guidance notes that magnets can work through fabric, but separation reduces pull force. The practical implication is to evaluate the intended layered assembly, not just the bare components.
Draw a simple cross-section showing where both parts sit. Identify the layers between them, including any seam bulk. Consider whether filling the product or bending a panel changes their alignment.
Soft foam and flexible fabric can make that spacing variable. Adding reinforcement may help control the local shape, but it also affects bulk, stiffness, and the feel of the surrounding panel.
The first trial should use representative materials wherever their behavior affects the result. If substitutes are necessary, record them and keep the conclusion provisional.
5. Resolve attachment, reinforcement, and containment
The closure must stay connected to the product through repeated use.
Decide how each part will be secured, what prevents movement or rotation, and where opening forces enter the surrounding textile. A small attachment area may need a backing structure or a connection into a more stable seam.
Follow the selected component’s assembly instructions. For example, FIDLOCK’s SNAP female S sewable datasheet defines a stitching area and a maximum material thickness for that specific part. These details illustrate why generic “sew it here” instructions are insufficient; they are not universal specifications for magnetic hardware.
For an enclosed magnet, define the enclosure and how it is retained in the textile. Check whether a needle path could damage a protective barrier. Do not assume a thin fabric pocket or an adhesive bond will provide adequate long-term containment without evaluation.
Also check the user-facing surface. A closure can leave a hard edge, a visible outline, or a pressure point that only becomes obvious in the sewn assembly.
6. Review cleaning, exposure, and nearby devices
A washable fabric does not automatically make the installed closure washable.
Ask the supplier about the selected part’s cleaning limitations, exposure conditions, and protective construction. Review the whole assembly against the intended care method, including drying. K&J notes that standard nickel-plated neodymium magnets are not waterproof; protection must be appropriate to the actual environment.
For wearables and health-related products, identify device-interference questions early. The FDA warns that sufficiently strong magnets in certain consumer electronics can affect implanted medical devices. Its guidance is not a blanket clearance for a custom magnetic closure. A product’s placement and use need their own assessment with appropriate specialists and device guidance.
If the product contains electronics or magnetic sensing components, involve the electronics team in reviewing the closure’s location and movement.
Containment also matters where children could access a detached magnet. The CPSC identifies serious ingestion hazards from high-powered magnets. Consider foreseeable access and damage to the assembly; simply concealing a magnet does not establish safety. Applicable product requirements and testing should be determined for the actual category and market.
7. Confirm sourcing and assembly control
Use an identifiable component in the prototype: supplier, part number, mating part, dimensions, material or coating, and relevant installation instructions.
A generic substitute that looks similar may behave differently. Establish how any substitution will be reviewed before it enters another sample or production.
Check sample availability, purchasing minimums, lead times, and whether standard colors or attachment formats suit the design. A custom housing or proprietary arrangement adds development work and should have a clear reason behind it.
Document orientation and alignment so the sample room can repeat the assembly. Where polarity matters, define how it will be checked before the magnet is enclosed. For finished fastener pairs, identify the matching components and intended mounting direction.
A functional check should verify both engagement and intentional release. Attraction alone may not confirm full engagement of a mechanical lock.
8. Give the first prototype a focused job
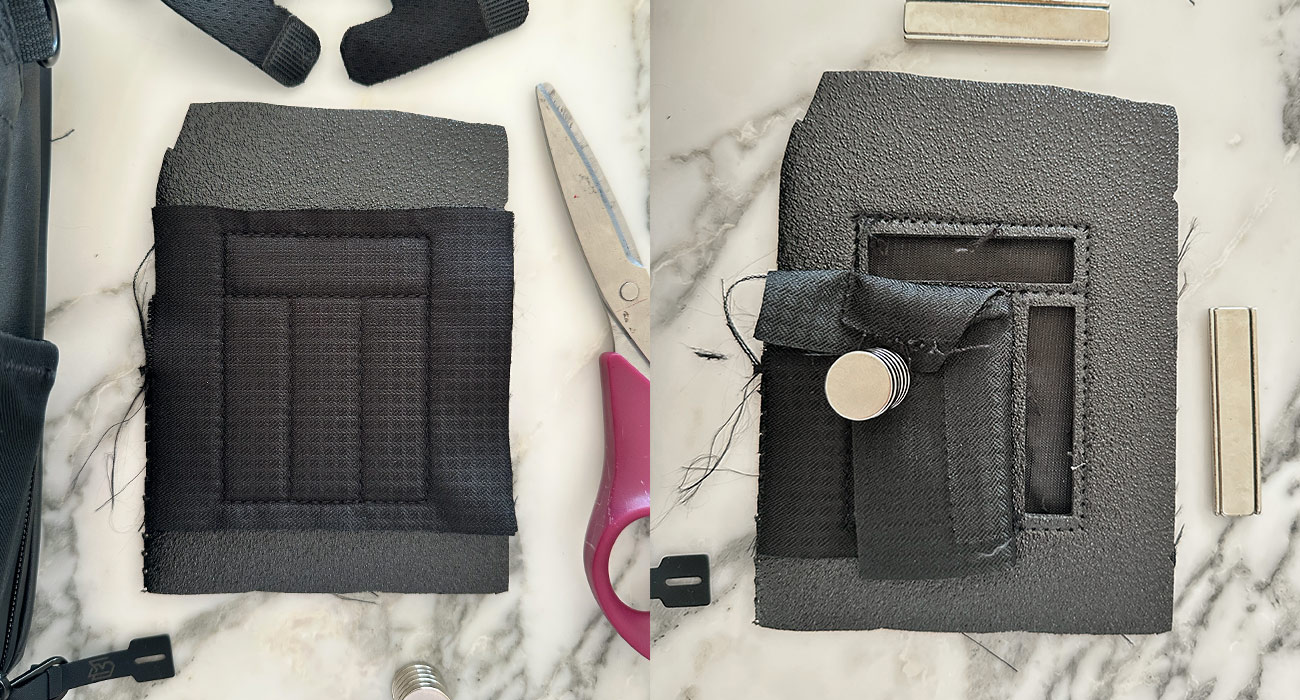
An early closure trial can be a small sewn section using the intended layers and reinforcement. It should reproduce the relevant geometry closely enough to answer a specific question.
| Question | Useful early investigation |
|---|---|
| Can the user close and open it as intended? | Operate a representative assembly in the intended position, with relevant users and conditions |
| Does it open unintentionally? | Examine the expected loading, panel deformation, and foreseeable snag directions |
| Does the attachment remain stable? | Evaluate repeated operation and inspect the textile, hardware, and enclosure |
| Does care change the behavior? | Compare the assembly before and after the proposed care process |
| Can the factory reproduce it? | Build several trial assemblies and compare alignment, engagement, and release |
Define acceptance criteria and appropriate test methods before the review. This table is a development-planning guide, not a substitute for product-specific validation or certification.
Photograph the setup, identify the components and material layers, and record what changed between trials. Keep usability observations separate from measured force results so the team knows what the evidence supports.
A practical example: a magnetic bag flap
Imagine a premium bag with a concealed magnetic flap closure. This is a hypothetical example, not a studioFAR client case study.
The first test should reproduce the flap’s material layers, reinforcement, and attachment spacing. Evaluate it with the intended contents and in the position in which the user will carry and open the bag.
If the flap opens when the bag is filled, investigate panel tension, alignment, and release direction before choosing a stronger magnet. If opening distorts the fabric, review the attachment and reinforcement as well as the hardware.
The useful outcome is a better-defined closure assembly and a clear list of questions for the complete prototype.
What the sample room should receive
Before requesting the full sample, provide:
- The selected closure and exact mating components.
- Placement, orientation, release direction, and relevant dimensions.
- A cross-section of the material stack and reinforcement.
- Attachment instructions and the planned assembly sequence.
- The intended use, care conditions, and evaluation criteria.
- Open questions requiring supplier or specialist input.
Magnetic closures are one example of the broader challenge of integrating hardware with soft goods. The hardware and textile construction need to be developed together.
studioFAR helps founders and product teams resolve these interfaces through product architecture, material and construction development, technical documentation, and prototype coordination. If a magnetic closure is central to your product, discuss the development challenge with studioFAR before committing to the full sample.
Frequently asked questions
Do magnetic closures work through fabric?
Yes, but the distance and alignment between the parts affect the connection. Include the fabric, lining, reinforcement, and protective enclosure when evaluating the assembly. A bare-component demonstration is not a reliable substitute for that trial.
Is a stronger magnet always a better choice?
No. It may make deliberate opening harder or place more stress on the attachment. First examine the loading direction, alignment, material stack, and release movement. The appropriate closure balances retention with usable opening under the product’s intended conditions.
What is the difference between a magnetic snap and a magnetic-mechanical buckle?
Some snaps rely primarily on magnetic attraction, while magnetic-mechanical designs combine magnetic guidance with a mechanical lock. Product names alone are not enough to identify the mechanism. Check the selected part’s documentation and evaluate how it engages and releases.
Can a soft goods product with magnets be machine washed?
Only when the chosen components and complete construction are suitable for the specified care process and have been appropriately evaluated. Confirm supplier instructions for that part and check the installed assembly after relevant care cycles. Do not infer washability from the textile alone.
Are magnetic closures suitable for children’s or medical products?
Suitability requires product-specific review. Detached high-powered magnets can present ingestion hazards, and magnetic fields can affect some implanted devices. The intended users, placement, containment, foreseeable use, and applicable requirements must be evaluated with the appropriate specialists before making suitability claims.
What belongs in a tech pack for a magnetic closure?
Include supplier and part references, mating components, placement and orientation, the material stack, reinforcement, attachment details, assembly checks, and agreed evaluation criteria. Keep those instructions aligned with the tested sample and document any approved substitutions.